409 Is So Fine!
Al Robinson, a boat owner in MS, provided these instructions and photos. Al has used this technique many times over the years, to painlessly apply vinyl decals. Thanks Al!
Hanging on to a slippery boat
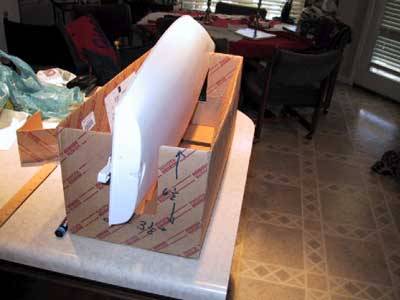
We have all found that holding the RC Laser on its side is a really squirrelly proposition. Al’s BOX holder is the answer. He has even given us the dimensions for the cuts, 3-1/2″ wide, 61/2″ deep! The box should be about 24″ long, and 10″ deep to make this work right.
Apply the wedgy
Use the cut out pieces of carboard to wedge the hull into the slots. In the picture, we see them placed under the steering wires which also serves to protect the wires from damage.
Secret Weapon
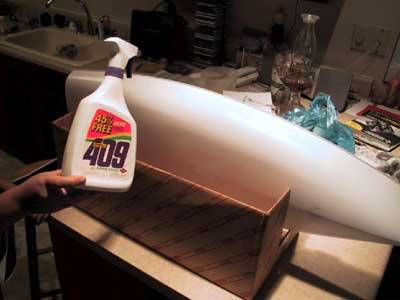
Ah, the secret ingredient. Al claims that 409 is THE material of choice. So arm yourself with a spray bottle, a plenty of towels. (Windex will also work, but not as well).
Wet, clean, Wet – Wet the hull side with 409 over the entire side of the boat where the decal will go – and wipe clean with a paper towel. This cleans the surface. Wait a few seconds and then hose it down again. The object is to have a “wet” hull to lay the decal on.
Save the paper towel that is wet with 409, it will be used as a squeegee to rub the bubbles and wrinkles out.
Get a friend to help pull the backing off the decal. When pulling the backing off the decal, sometimes static electricity attracts the film to itself and you don’t want the adhesive backing to make contact with itself! Lay it on the hull, leaving about 1/4″ at the back so there will be enough decal left to finish around the bow neatly.
First Alignment
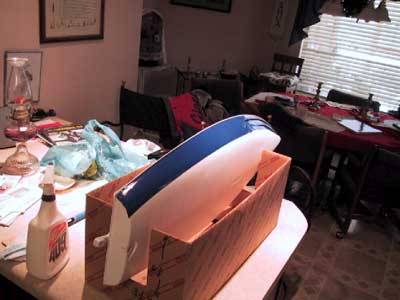
Try to lay the decal on the side of the boat without stretching. You may find that the decal does not fit evenly along the rail (deck to hull edge) of the boat. In this case, slide the decal up so that the top edge of the decal touches the bottom of the rail at the bow and stern, and let the decal extend above the rail in the middle. When in position check to see that the bottom edge of the decal is straight and has no “waves” when finished. You can always trim the top edge along the rail using a razor knife later.
A Mistake is not life threatening!
Look closely at this picture and you will see two sizeable flaps (wrinkles) in the bow section. I think Al did this to make a point. This would be hard to recover from if you weren’t using 409. However, with the 409 underneath, the decal can be “worked” by peeling up and reapplying, or sliding. Be careful not to stretch the material while working, it is very thin. You want it to be relaxed so it doesn’t want to creep later.
Smooth and Dry
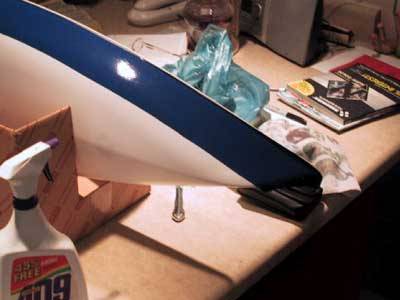
Start at the bow and work your way back keeping the bottom line straight. Make sure the bow has a good 1/8″ – 1/4″ wrap that will overlap the other side. Use the paper towel “dampened” (not soaked) with 409 to rub out the wrinkles/bubbles working from the middle up and then down, lifting and re-positioning the decal if necessary. Don’t hesitate to lift and re-wet with a shot of 409, and keep going.
Trim up
When the whole decal is “squeegeed” out and dry, take a razor blade and cut the top of the decal right along the bottom of the rail.
Side Two
Now you are ready for side two. Follow the same guidelines, except when initially positioning look carefully at the bow to make sure that the bottom edges of the two decals are exactly aligned where they meet (look at boat from the bow to see this)
Bow Overlap
Some may be tempted to try to cut a centerline in the bow overlap so that the two decals end up butting each other. This is hard to do correctly, and you take the chance that shrinkage and/or contact may loosen this butt joint. The better part of valor is to leave them overlapped. You will be hard pressed to see it.
Heat Treatment
Using a hair dryer to gently warm your completed application may have some value, but it is not proven. It can’t hurt unless you set it on fire, so feel free to heat it up a little if you choose (medium to low heat setting).
No Wait
You can go sailing as soon as you are through.
Damage
Some day you are bound to damage the vinyl decal. It is not nearly as tough as the boat itself. Be careful with your SS cradle, even protecting the decal by putting a little cushion over the SS ends. Remember the 409. If you get a flap (smear or tear) where the material is still there but just displaced, you can try pulling it away from the hull, squirting a little 409 under it, and then smoothing it back in place. If you really tear it up, you will be pleased to know that you can simply peel off the whole decal and replace it with a new one!
This article was written by Steve Lang of SailRC.com.


